

How to make your own Christmas decorations
While you’re adding gift wrap, candy canes and advent calendars to your list of things to organise for the festive season, don’t forget decorations. Once you’ve sorted the wreath for the front door and the jolly Santa dressed in red and white for the garden, we’ve got the inside covered, including Christmas decorations for kids.
Our list of homemade Christmas decoration ideas are the perfect Christmas crafts for kids and will deck the halls in every corner of your pad. Whether you’re using cardboard from leftover paper plates or red and green felt tips to create a festive gingerbread house, these crafts are cheap and definitely cheerful.

Easy DIY decorations

Twig Christmas trees
Twig Christmas trees are fun and easy to make, using materials found in the garden or park. Kids will love foraging for the perfect sticks.
Collect twigs and break them into different lengths, ranging from 2cm to 10cm.
Use a glue such as PVA to attach the twigs horizontally across a lollipop stick or pipe cleaner, put the shortest at the top and the longest at the bottom to create a triangle or tree shape.
Find something to represent a star for the top of the tree and decorate the twigs by sticking on beads.
Paper ‘baubles’
These snowflakes are a great way to recycle your loo rolls – you’ll need eight in total for each snowflake.
Take some thin card in any colour of your choice, then draw simple Christmas shapes like wreaths, stars or bells.
Draw a smaller version of the same shape inside your initial outline. You can use cookie cutters as a template or just draw the shapes freehand.
Cut out the shapes but also cut away the middle area so you are left with the outside frame to form a stencil.
This can be painted, coloured in with pens or crayons, decorated with buttons, sequins, stickers and washi tape (that’s Japanese decorative tape).
Using tape, attach a loop of ribbon to the reverse side at the top so it can be hung on the tree.

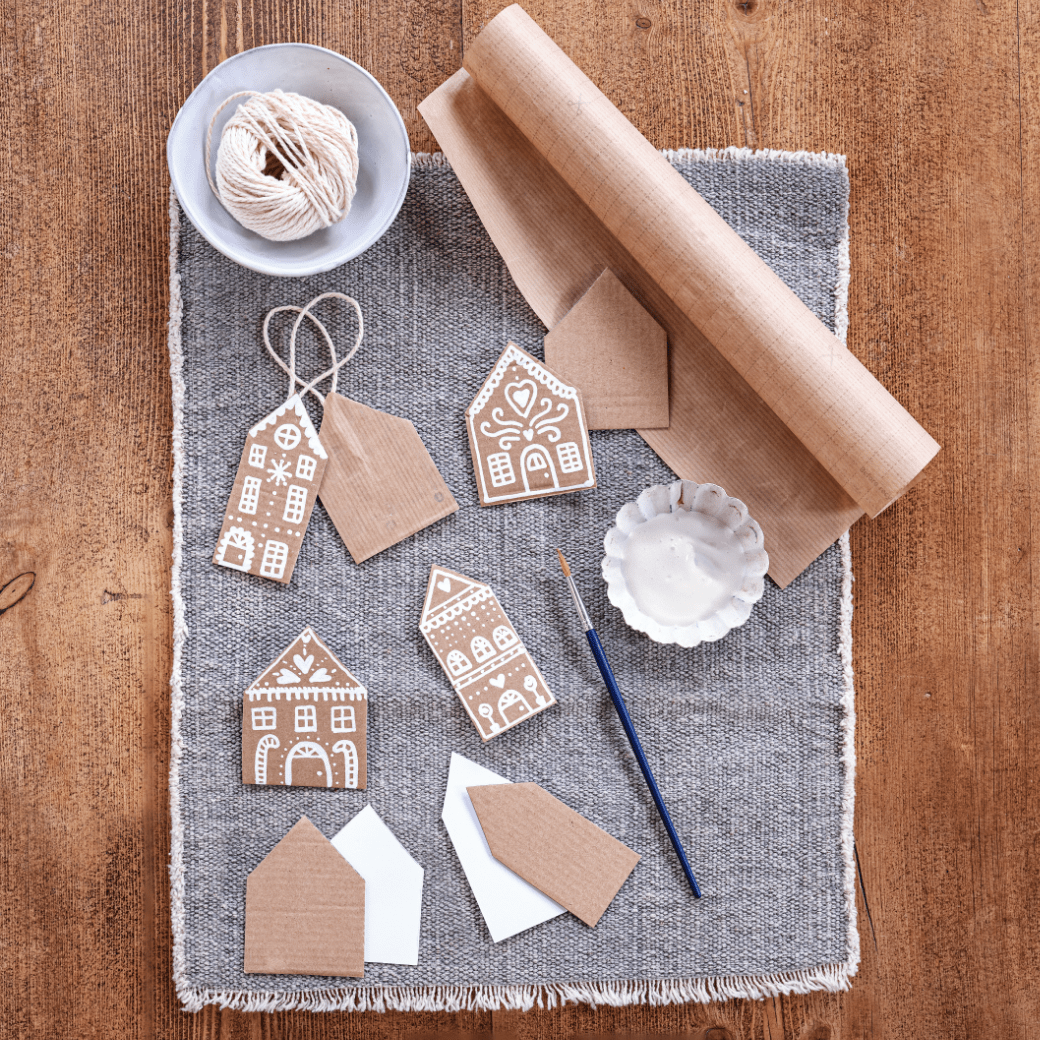
‘Gingerbread’ houses
Draw a few house shapes on a piece of scrap paper and cut them out to use as templates.
Place them on some cardboard, draw around them, then carefully cut them out. Using a chalk pen, draw some designs onto the houses.
When the ink is dry, turn the houses over and glue a loop of string to the back of each.
Then glue the backs of the houses and press them down on some brown paper, so the loops are sandwiched in between.
Allow to dry, then cut away the brown paper; you can decorate this side or leave it plain. Hang up and admire!
Fabric stars
Cut a potato in half. Push a small star-shaped cutter into one half, then use a knife to chop about 1cm off the face of the potato, right up to the cutter. Remove the trimming to reveal the star stamp.
Lay down some newspaper and put some plain fabric on top. Put a little paint into a dish, use a brush to apply some to the potato stamp, then press firmly onto the fabric.
Print as many stars as you like, leaving space around each. Add more paint to the stamp as needed. When the stars are dry, paint on some extra detail in another colour of paint.
When dry, centre the large cutter over a star.


Trace around it and cut it out.
Then, cut out a separate square of fabric that’s just a little bit bigger. Flip the fabric star over and glue a loop of string onto the back.
Add glue to the edges too, leaving a gap to add cotton wool as stuffing, then stick onto the fabric square. Repeat with all the stars.
When dry, cut around the stars so the squares are trimmed to the same size and shape.
Pull off pieces of cotton wool and stuff into the stars – poke it into the points using the end of a paintbrush.
Add a bit of glue to seal each star. Allow to dry before hanging up.
CINNAMON RUDOLPHS
Sift icing sugar into a small bowl, add 1 tsp cold water and mix to make a stiff paste.
On a board, put 2 cinnamon sticks together in a ‘V’ shape. Using the tip of a knife or pointy spoon handle, put a small blob of icing onto each stick, about 2cm from the top.
Lay a third stick horizontally, over the icing, and press together gently to make a triangle.
Repeat with the rest of the cinnamon sticks. Cover the bowl of icing so it doesn’t dry out, then leave the cinnamon shapes to set for 20 mins.
To make the reindeer’s eyes, put 2 small blobs of icing onto each horizontal cinnamon stick, about 3.5cm apart.
Top each one with a dark chocolate ball. We used the Dr Oetker Sprinkles Mix.
Add a blob of icing to the base of each midget gem and stick onto the cinnamon shapes at the point of the ‘V’ – this is Rudolph’s red nose! Leave to set for 40 mins.
To finish, gently tie a piece of ribbon or string around the horizontal cinnamon stick so it can hang from your tree.

Want something different?

Stained-Glass Biscuits
Want edible decorations? Have a go at making these Stained-Glass Biscuits. Make the reflective surface from your favourite flavour sweet – they look amazing next to fairy lights.
Get the recipe >
Don’t have time to make your own? You can shop our range in the Christmas decorations aisle now.
Plus, don’t forget the wrapping paper and little extras. Check out our list of gift wrap and accessories in our Christmas Shop.